How to Generate an Invoice on Komier — Professional Invoices in Under a Minute
Generating a professional invoice should not take longer than a minute. With your clients saved and your inventory built, Komier’s invoice generator reduces the process to a handful of clicks — select a client, add your items, set the date, export. Done.
This guide walks through every step of creating an invoice in Komier, from opening a new invoice to sending it to your client.
Before You Start
To get the most out of Komier’s invoice generator, make sure you have completed two things first:
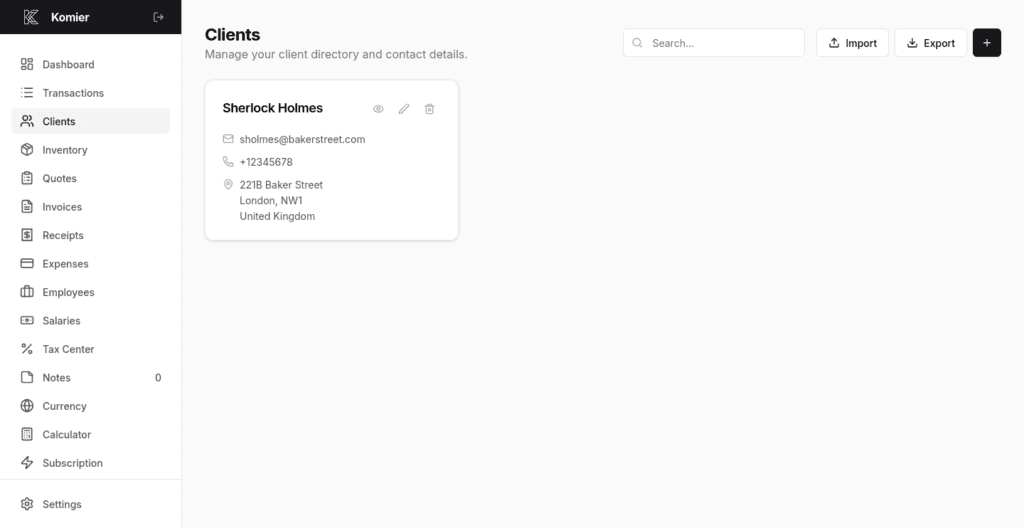
Added your client to the Clients section — see Blog 1 in this series
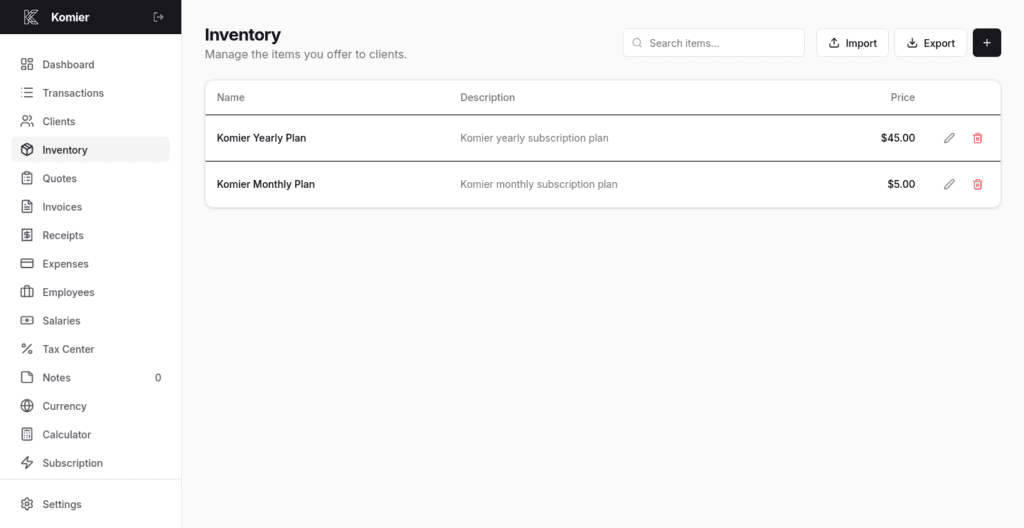
Added your products or services to the Inventory section — see Blog 2 in this series
If those are in place, generating an invoice takes under 60 seconds. If not, you can still create an invoice manually — it simply takes a little longer.
Step-by-Step: Generating an Invoice on Komier
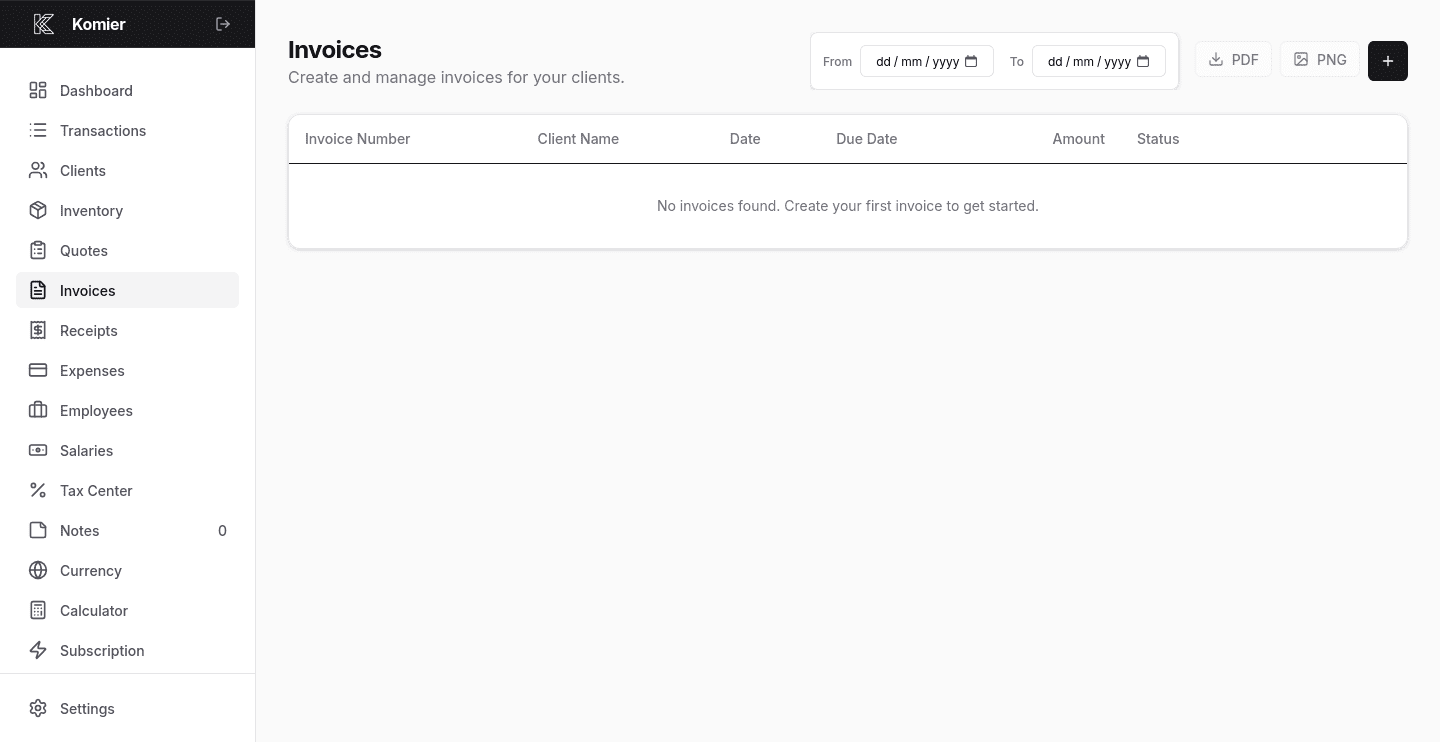
Step 1 — Open the Invoice Generator
Select Invoices from the left-hand navigation menu in your dashboard.
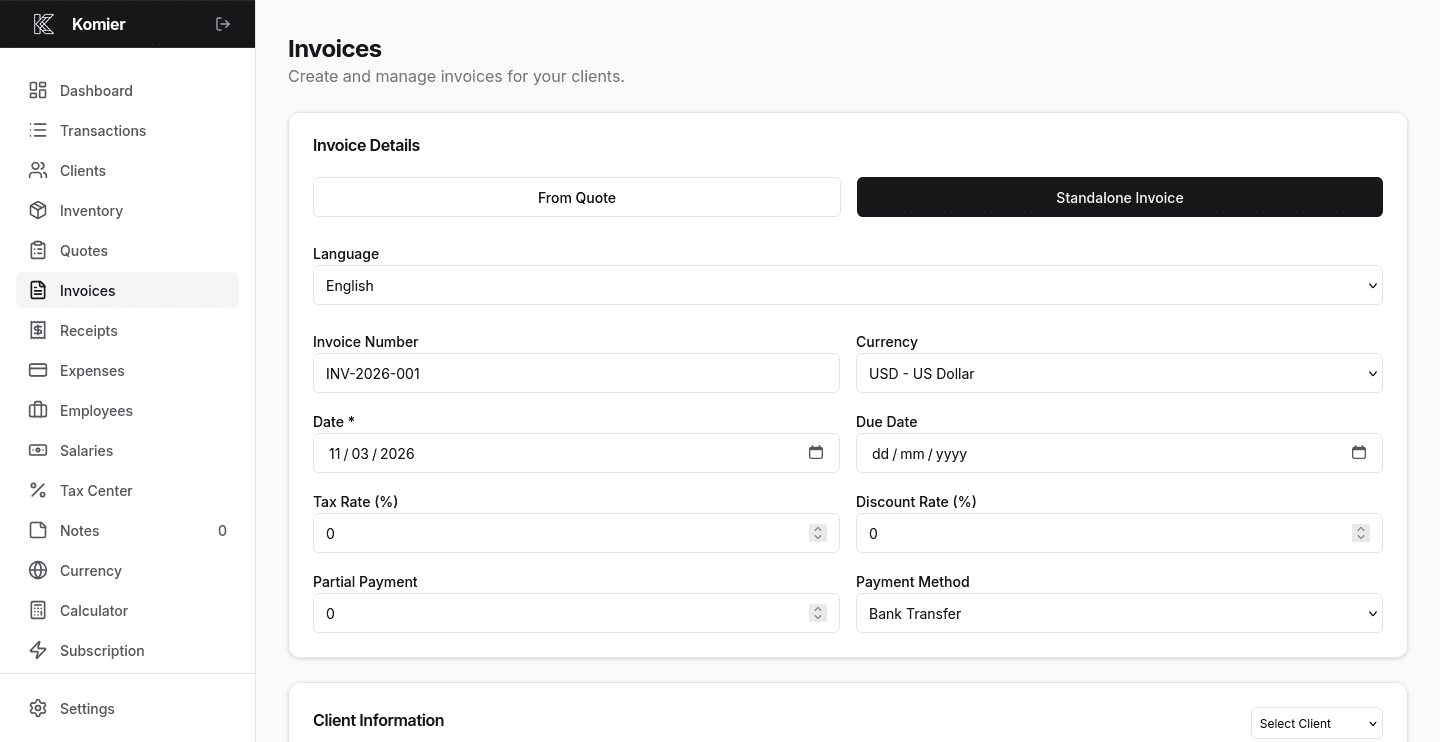
Step 2 — Add New Invoice
Click on the + button at the top of the Invoces page to open a blank invoice form.
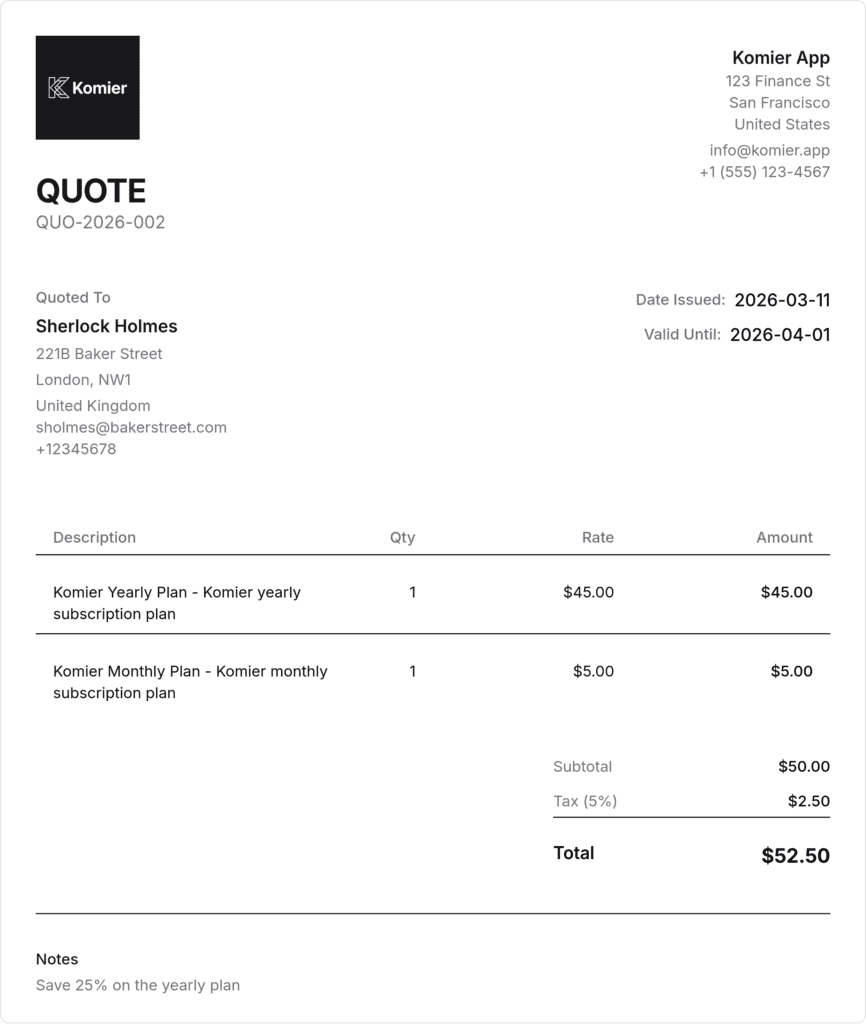
Select From Quote if you already have a quote recorded which will automatically fill the rest for that client.
Otherwise if it’s a new client select Standalone Invoice
Komier defaults to today’s date for the invoice date.
Set your payment due date — 7, 14, or 30 days is standard depending on your terms.
Add Tax or Discount rates if applicable
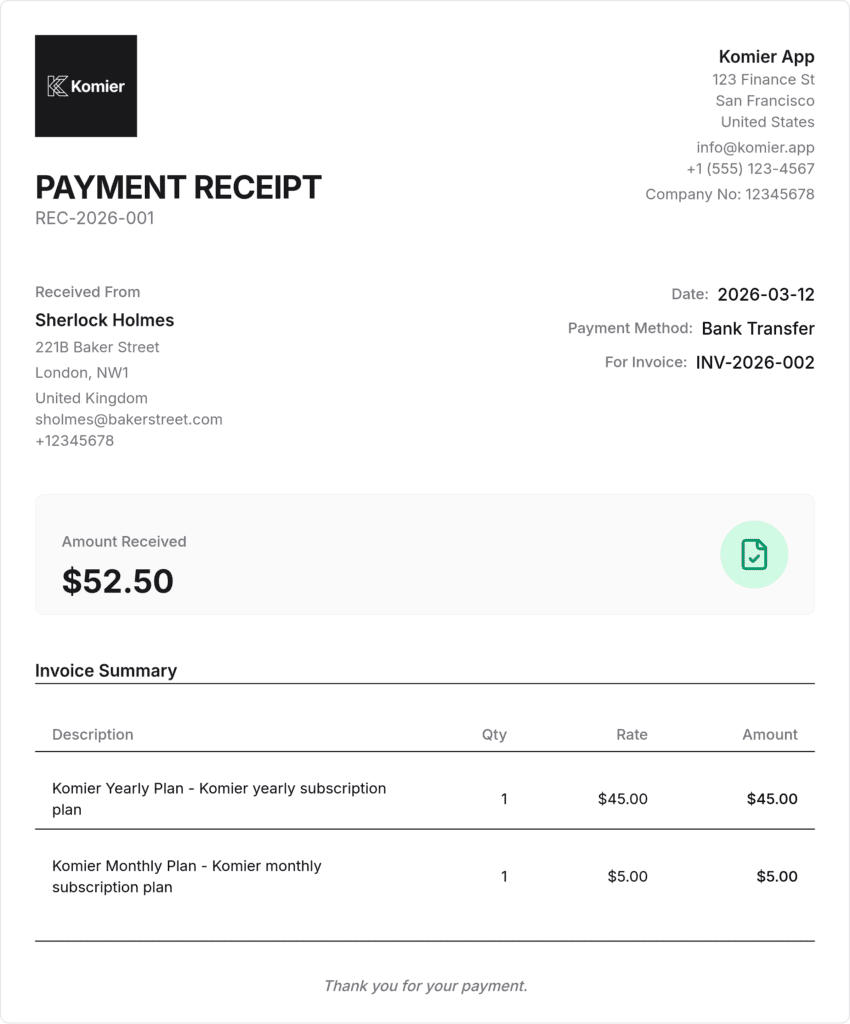
If the client is making a partial payment, fill the Partial Payment field and select Payment Method. Note that this will automatically create a receipt under the Receipt Generator for that amount paid.
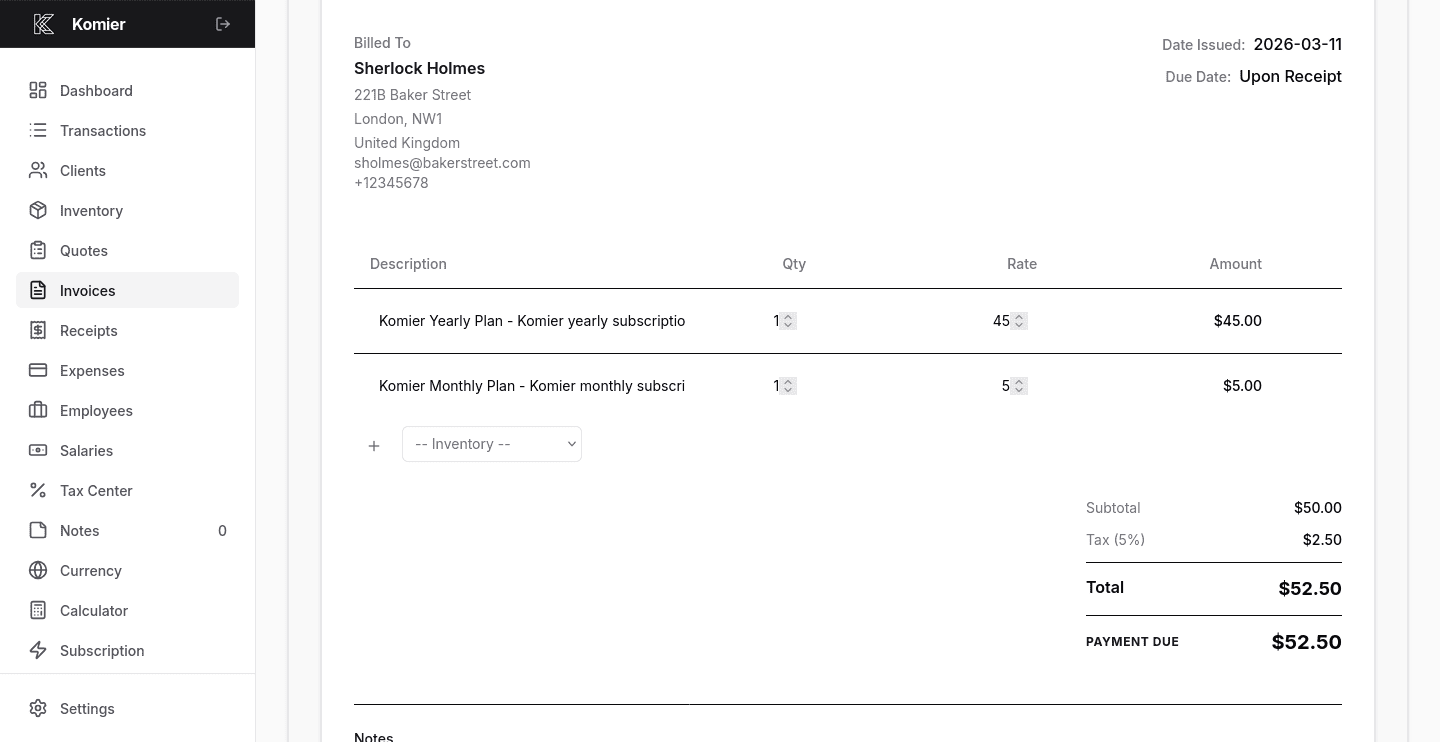
Komier calculates everything and adds it to the total automatically.
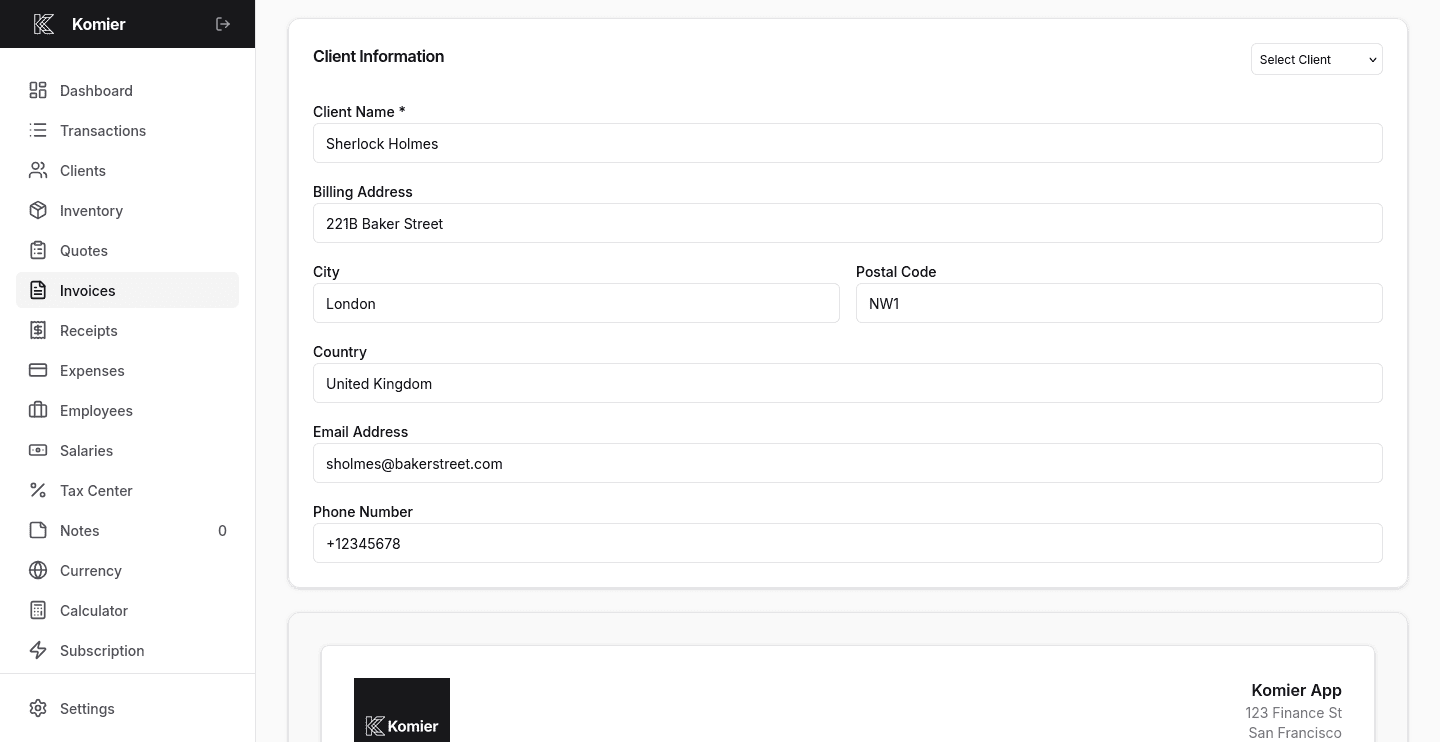
Step 3 — Select or add your client
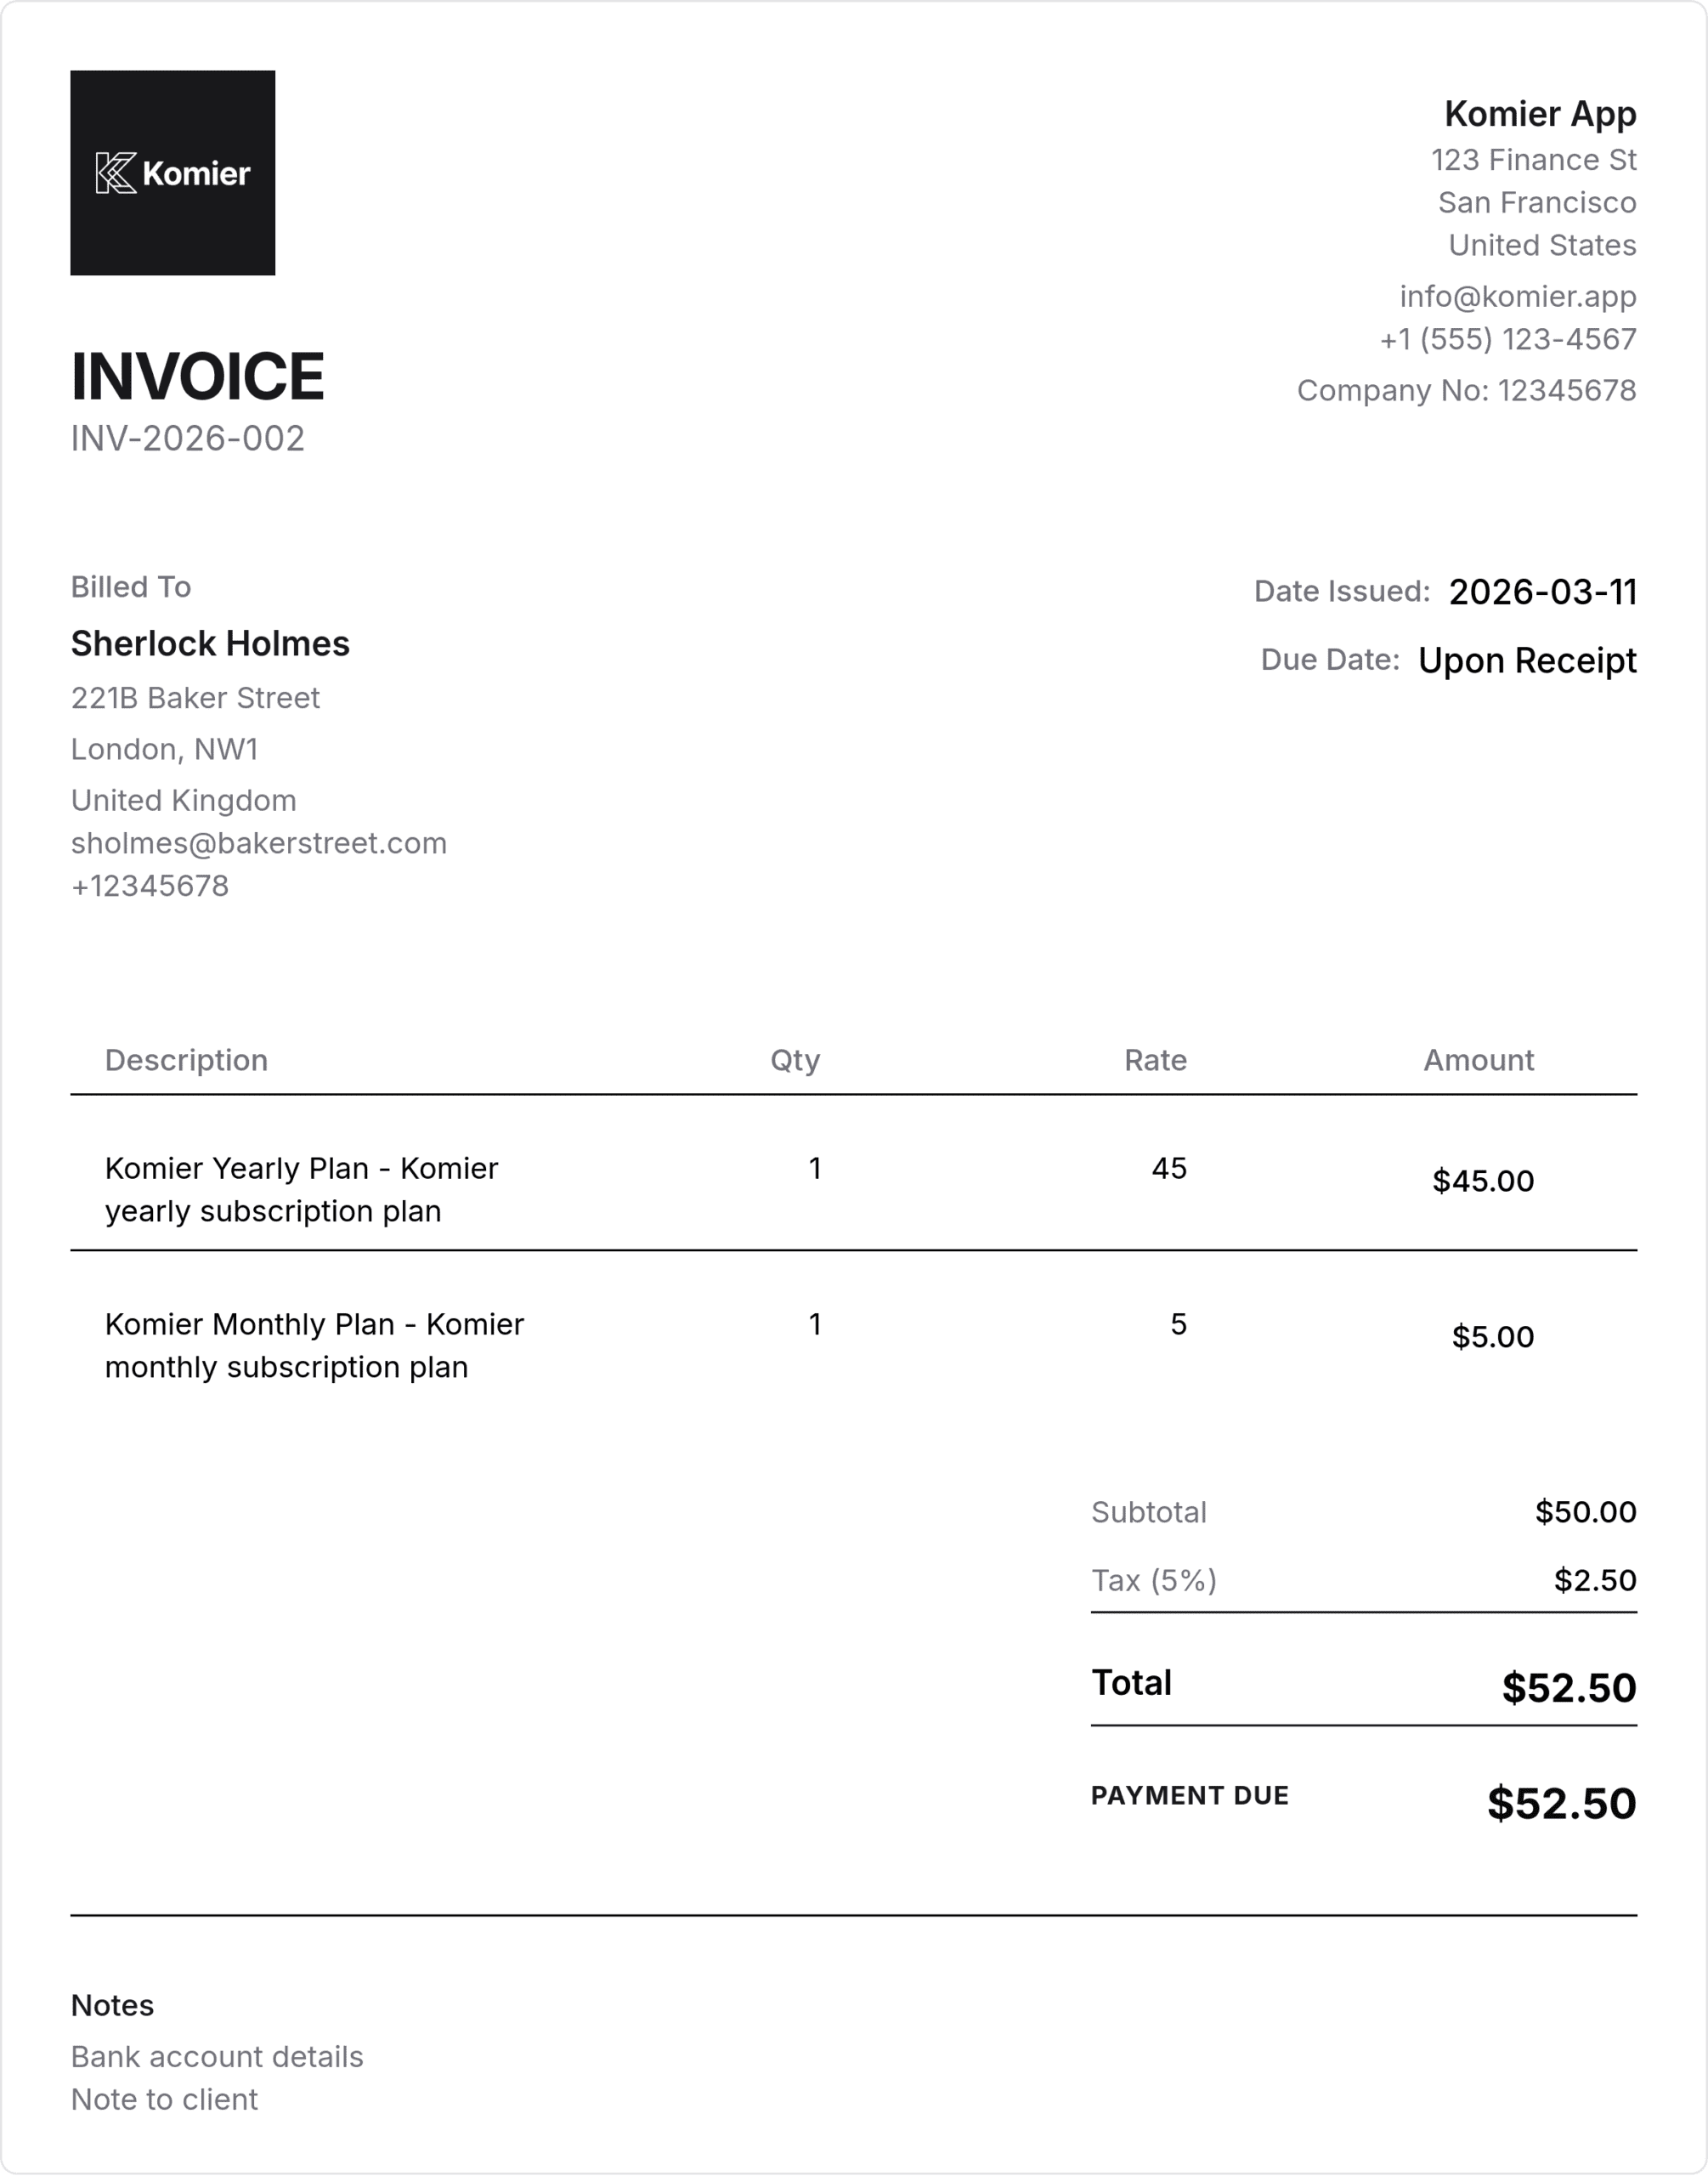
Select the client from your saved client list or add a new one. All client details — name, billing address, email — populate automatically from your client directory.
Step 4 — Add your services or products from inventory
Click Add Item or select from your saved inventory. The item name, description, and unit price fill in automatically. Set the quantity and Komier calculates the line total.
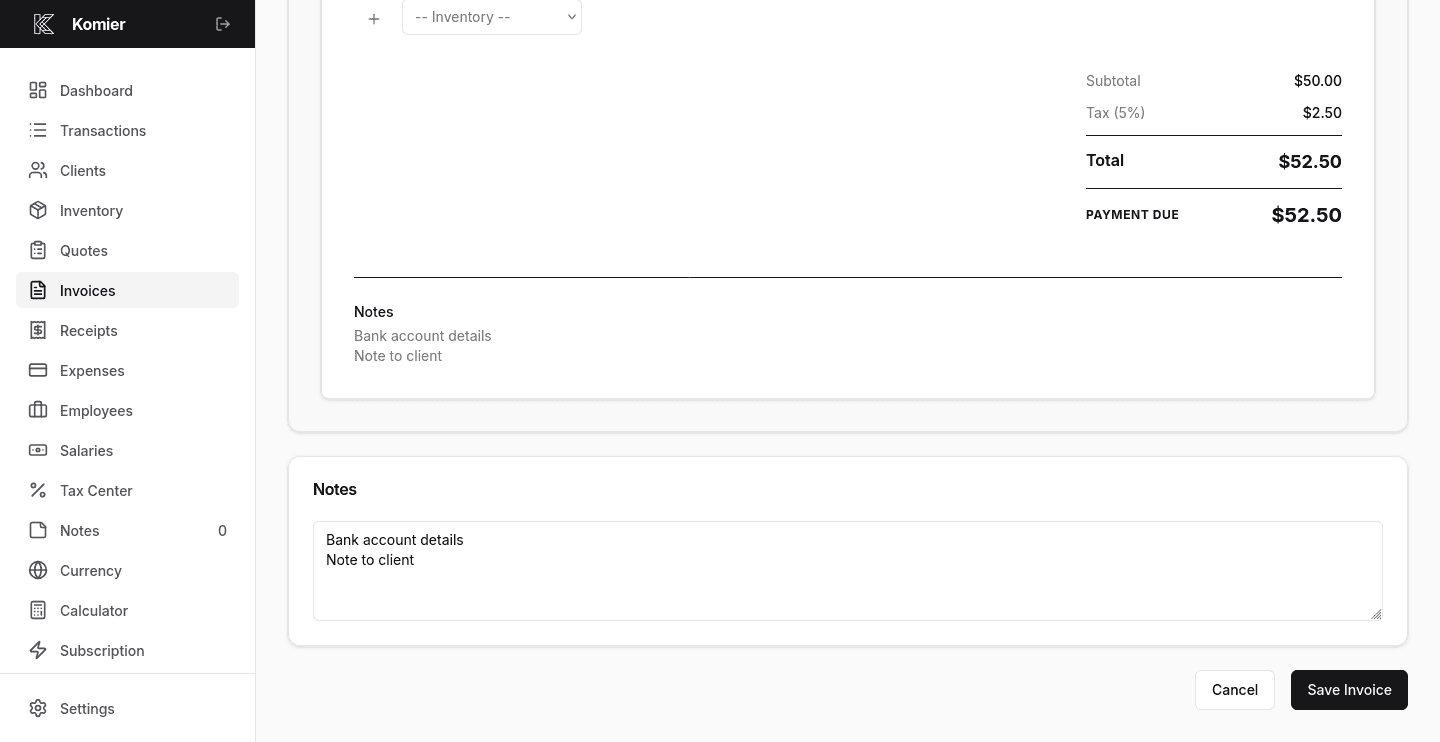
Step 5 — Add notes, conditions, payment terms, and Save
Use the Notes field to include payment details, bank account information, or any message to your client.
When done, click Save, and export the quote as a PDF or PNG.
It is ready to email, share, or print immediately.
Pro Tip:
Add your bank account or payment link in the invoice notes field so your client knows exactly how to pay you. This one habit reduces late payments significantly.
Multi-Currency Invoicing
If you invoice international clients in a different currency from your local one, Komier handles this natively. When creating an invoice, select the currency for that specific invoice from the currency dropdown. Your local dashboard and expense records remain in your home currency — the invoice reflects the client’s billing currency.
This is particularly useful for freelancers and SMEs in Africa and India who earn in USD or EUR but operate locally in Naira, Rupees, or Kenyan Shillings.
Managing and Updating Invoice Records
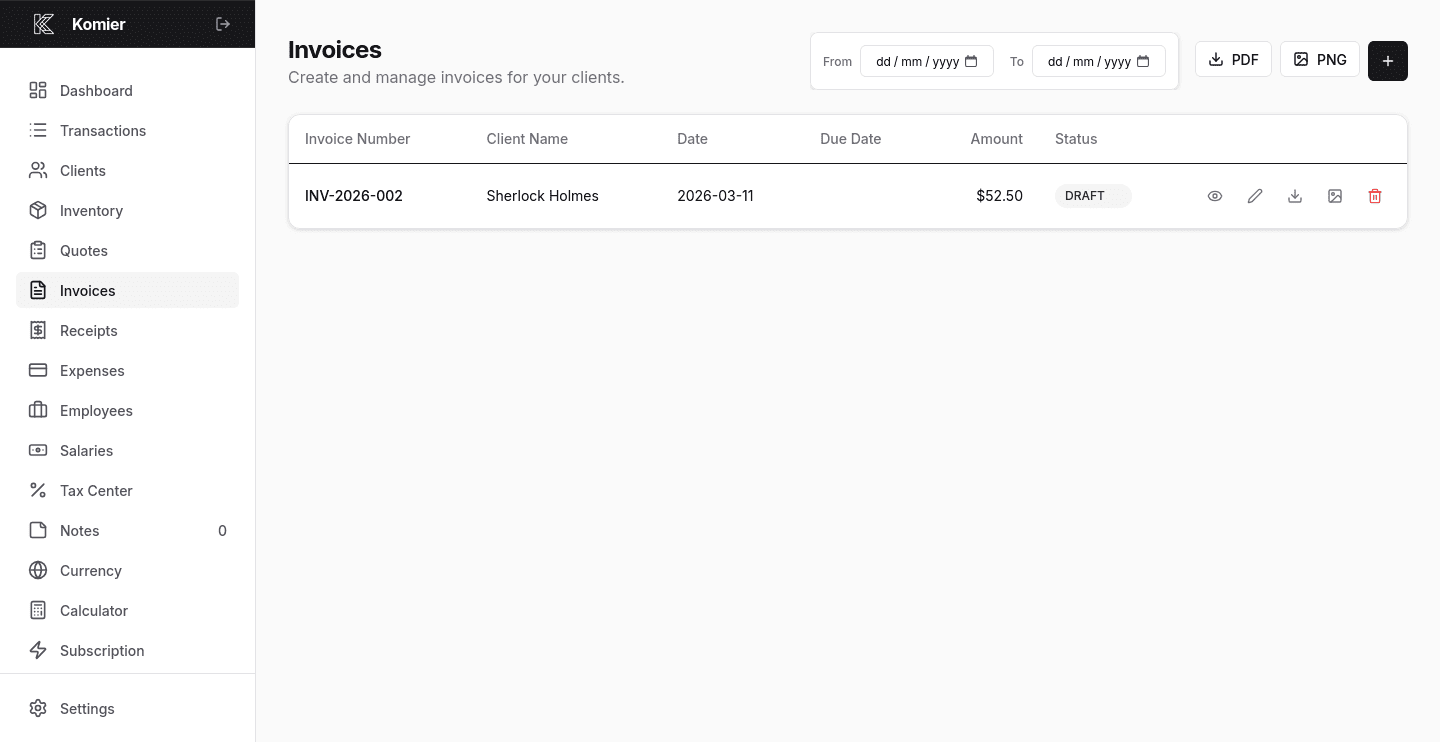
Once an invoice is generated, it appears in your Invoices list with a status indicator:
DRAFT — created but not yet sent (This is the default state after saving it)
SENT— sent, awaiting payment
PARTIAL – partial payment received
PAID — payment received and marked
OVERDUE — past the due date without payment
Note: For an invoice to be available on the Receipt Generator for quick processing, it has to be marked as SENT. Marking an invoice as PARTIAL or PAID updates your transaction ledger and financial dashboard automatically. Your revenue figures, net profit calculation, and tax estimate all reflect the payment in real time.
Ready to generate your first professional invoice?
Start your free 3-day trial — full access, no credit card required.